1.ActiveMQ
ActiveMQ与RabbitMQ的异同?使用方法?ActiveMQ与Spring整合?
1.1. 什么是ActiveMQ
ActiveMQ 是Apache出品,最流行的,能力强劲的开源消息总线。ActiveMQ 是一个完全支持JMS1.1和J2EE 1.4规范的 JMS Provider实现,尽管JMS规范出台已经是很久的事情了,但是JMS在当今的J2EE应用中间仍然扮演着特殊的地位。
主要特点:
- 多种语言和协议编写客户端。语言: Java, C, C++, C#, Ruby, Perl, Python, PHP。应用协议: OpenWire,Stomp REST,WS Notification,XMPP,AMQP
- 完全支持JMS1.1和J2EE 1.4规范 (持久化,XA消息,事务)
- 对Spring的支持,ActiveMQ可以很容易内嵌到使用Spring的系统里面去,而且也支持Spring2.0的特性
- 通过了常见J2EE服务器(如 Geronimo,JBoss 4, GlassFish,WebLogic)的测试,其中通过JCA 1.5 resource adaptors的配置,可以让ActiveMQ可以自动的部署到任何兼容J2EE 1.4 商业服务器上
- 支持多种传送协议:in-VM,TCP,SSL,NIO,UDP,JGroups,JXTA
- 支持通过JDBC和journal提供高速的消息持久化
- 从设计上保证了高性能的集群,客户端-服务器,点对点
- 支持Ajax
- 支持与Axis的整合
- 可以很容易得调用内嵌JMS provider,进行测试
1.2 ActiveMQ的消息形式
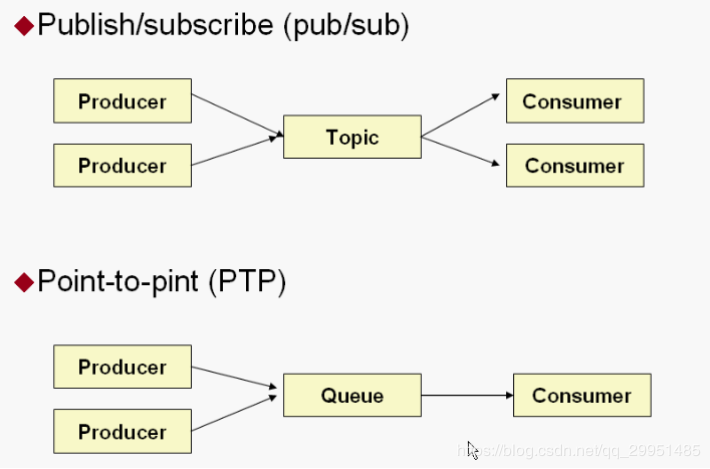
对于消息的传递有两种类型:
一种是点对点的,即一个生产者和一个消费者一一对应;
另一种是发布/订阅模式,即一个生产者产生消息并进行发送后,可以由多个消费者进行接收。
JMS定义了五种不同的消息正文格式,以及调用的消息类型,允许你发送并接收以一些不同形式的数据,提供现有消息格式的一些级别的兼容性。
· StreamMessage – Java原始值的数据流
· MapMessage–一套名称-值对
· TextMessage–一个字符串对象
· ObjectMessage–一个序列化的 Java对象
· BytesMessage–一个字节的数据流2. ActiveMQ的安装
进入http://activemq.apache.org/下载ActiveMQ
使用的版本是5.12.0
使用的版本是5.12.0
2.1 安装环境:
1、需要jdk
2、安装Linux系统。生产环境都是Linux系统。
2.2 安装步骤
第一步: 把ActiveMQ 的压缩包上传到Linux系统。
第二步:解压缩。
第三步:启动。
使用bin目录下的activemq命令启动:
[root@localhost bin]# ./activemq start
关闭:
[root@localhost bin]# ./activemq stop
查看状态:
[root@localhost bin]# ./activemq status
注意:如果ActiveMQ整合spring使用不要使用activemq-all-5.12.0.jar包。建议使用5.11.2
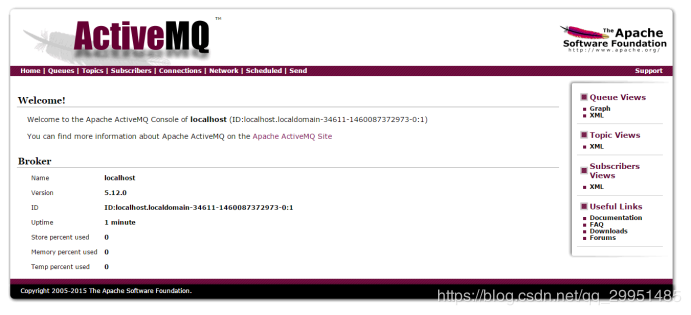
进入管理后台:
http://192.168.25.168:8161/admin
用户名:admin
密码:admin
2.3.解决405问题:
修改hosts文件,配置机器名和127.0.0.1的映射关系。
机器名:/etc/sysconfig/network文件中定义了机器名: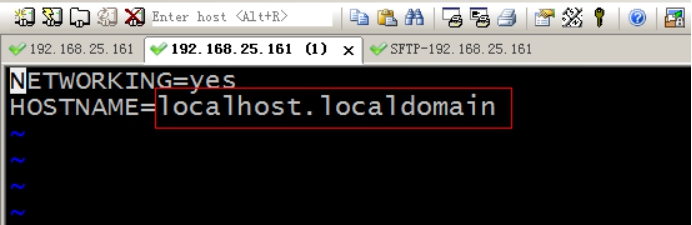
tHost文件的配置:
q重新启动Activemq的服务
3.ActiveMQ的使用方法
3.1 Queue
3.1.1. Producer
生产者:生产消息,发送端。
把jar包添加到工程中。使用5.11.2版本的jar包。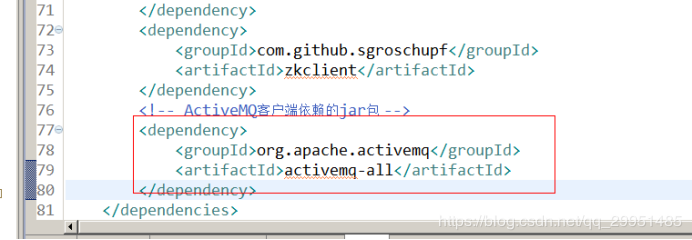
第一步:创建ConnectionFactory对象,需要指定服务端ip及端口号。
第二步:使用ConnectionFactory对象创建一个Connection对象。
第三步:开启连接,调用Connection对象的start方法。
第四步:使用Connection对象创建一个Session对象。
第五步:使用Session对象创建一个Destination对象(topic、queue),此处创建一个Queue对象。
第六步:使用Session对象创建一个Producer对象。
第七步:创建一个Message对象,创建一个TextMessage对象。
第八步:使用Producer对象发送消息。
第九步:关闭资源。
1 |
|
3.1.2. Consumer
消费者:接收消息。
第一步:创建一个ConnectionFactory对象。
第二步:从ConnectionFactory对象中获得一个Connection对象。
第三步:开启连接。调用Connection对象的start方法。
第四步:使用Connection对象创建一个Session对象。
第五步:使用Session对象创建一个Destination对象。和发送端保持一致queue,并且队列的名称一致。
第六步:使用Session对象创建一个Consumer对象。
第七步:接收消息。
第八步:打印消息。
第九步:关闭资源
1 |
|
3.2. Topic
3.2.1. Producer
使用步骤:
第一步:创建ConnectionFactory对象,需要指定服务端ip及端口号。
第二步:使用ConnectionFactory对象创建一个Connection对象。
第三步:开启连接,调用Connection对象的start方法。
第四步:使用Connection对象创建一个Session对象。
第五步:使用Session对象创建一个Destination对象(topic、queue),此处创建一个Topic对象。
第六步:使用Session对象创建一个Producer对象。
第七步:创建一个Message对象,创建一个TextMessage对象。
第八步:使用Producer对象发送消息。
第九步:关闭资源。
1 |
|
3.2.2. Consumer
消费者:接收消息。
第一步:创建一个ConnectionFactory对象。
第二步:从ConnectionFactory对象中获得一个Connection对象。
第三步:开启连接。调用Connection对象的start方法。
第四步:使用Connection对象创建一个Session对象。
第五步:使用Session对象创建一个Destination对象。和发送端保持一致topic,并且话题的名称一致。
第六步:使用Session对象创建一个Consumer对象。
第七步:接收消息。
第八步:打印消息。
第九步:关闭资源
1 |
|
4. Activemq整合spring
4.1. 使用方法
第一步:引用相关的jar包。
1 | <dependency> |
第二步:配置Activemq整合spring。配置ConnectionFactory
1 |
|
第三步:配置生产者。
使用JMSTemplate对象。发送消息。
第四步:在spring容器中配置Destination。
1
2
3
4
5
6
7
8
9
10
11
12
13
14
15
16
17
18
19
20
21
22
23
24
25
26
27
28
29
30
31
32
33
34
35
36
37
<beans xmlns="http://www.springframework.org/schema/beans"
xmlns:context="http://www.springframework.org/schema/context" xmlns:p="http://www.springframework.org/schema/p"
xmlns:aop="http://www.springframework.org/schema/aop" xmlns:tx="http://www.springframework.org/schema/tx"
xmlns:xsi="http://www.w3.org/2001/XMLSchema-instance"
xsi:schemaLocation="http://www.springframework.org/schema/beans http://www.springframework.org/schema/beans/spring-beans-4.2.xsd
http://www.springframework.org/schema/context http://www.springframework.org/schema/context/spring-context-4.2.xsd
http://www.springframework.org/schema/aop http://www.springframework.org/schema/aop/spring-aop-4.2.xsd http://www.springframework.org/schema/tx http://www.springframework.org/schema/tx/spring-tx-4.2.xsd
http://www.springframework.org/schema/util http://www.springframework.org/schema/util/spring-util-4.2.xsd">
<!-- 真正可以产生Connection的ConnectionFactory,由对应的 JMS服务厂商提供 -->
<bean id="targetConnectionFactory" class="org.apache.activemq.ActiveMQConnectionFactory">
<property name="brokerURL" value="tcp://192.168.25.168:61616" />
</bean>
<!-- Spring用于管理真正的ConnectionFactory的ConnectionFactory -->
<bean id="connectionFactory"
class="org.springframework.jms.connection.SingleConnectionFactory">
<!-- 目标ConnectionFactory对应真实的可以产生JMS Connection的ConnectionFactory -->
<property name="targetConnectionFactory" ref="targetConnectionFactory" />
</bean>
<!-- 配置生产者 -->
<!-- Spring提供的JMS工具类,它可以进行消息发送、接收等 -->
<bean id="jmsTemplate" class="org.springframework.jms.core.JmsTemplate">
<!-- 这个connectionFactory对应的是我们定义的Spring提供的那个ConnectionFactory对象 -->
<property name="connectionFactory" ref="connectionFactory" />
</bean>
<!--这个是队列目的地,点对点的 -->
<bean id="queueDestination" class="org.apache.activemq.command.ActiveMQQueue">
<constructor-arg>
<value>spring-queue</value>
</constructor-arg>
</bean>
<!--这个是主题目的地,一对多的 -->
<bean id="topicDestination" class="org.apache.activemq.command.ActiveMQTopic">
<constructor-arg value="topic" />
</bean>
</beans>
第五步:代码测试
1 |
|
4.2. 代码测试
4.2.1 发送消息
第一步:初始化一个spring容器
第二步:从容器中获得JMSTemplate对象。
第三步:从容器中获得一个Destination对象
第四步:使用JMSTemplate对象发送消息,需要知道Destination
1 |
|
4.2.2 接收消息
search-Service中接收消息。
第一步:把Activemq相关的jar包添加到工程中
第二步:创建一个MessageListener的实现类。
1 | public class MyMessageListener implements MessageListener { |
第三步:配置spring和Activemq整合。
1 | <?xml version="1.0" encoding="UTF-8"?> |
第四步:测试代码。
1 |
|